DIY Galaxy Tee!

Tuesday, August 21, 2012


Hello there, people! Welcome to another DIY post of mine, a sub-feature of the Studio/Kitchen feature. :D

Lately, I've been stunned by the gorgeous galaxy print fashion often seen in Tumblr and fashion blogs. Unfortunately, here in Indonesia, there are still so few stores that have them. AND, if any, they're unreasonably pricey (for my pocket, at least :p).

That's why, my friend Amanda and I decided to make our own DIY Galaxy Tees! Well, tanks, to be exact. (; And we wanna share that with you!

We mainly got the instruction from Wise Rabbit Says, but we added a few of our own touches here and there! (; We'll include our commentary on the process below.

First things first, here are the things that you'll need to make a DIY Galaxy Tee / Tank.

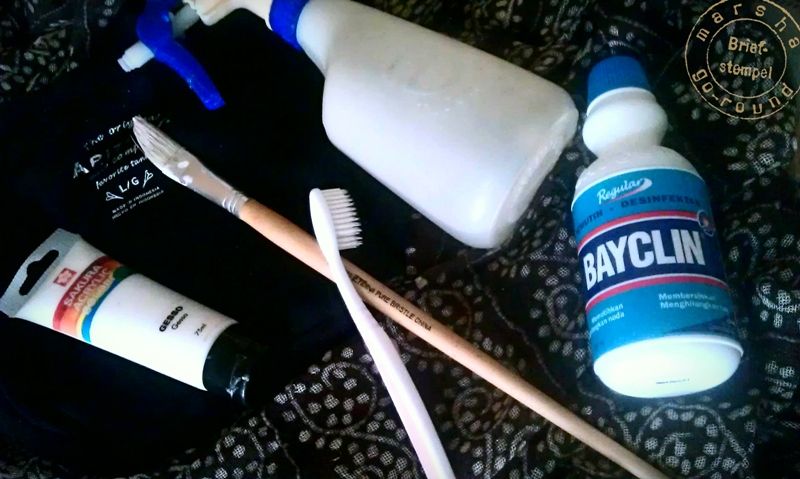
Supplies: a garment (I chose black for my first to-sell collection), bleach, water, spray bottle, acrylic paint, paintbrush or old toothbrush, hairdryer, some plastic bags, glove (optional, recommended if you have sensitive skin).

And now, let the process commence! :D

First mix up a bleach solution of 1 part bleach, 3 parts water and fill your spray bottle with it.
Commentary: We found out that this bleach/water ratio to be not quite effective on our garments, especially Amanda's. With that ratio, nothing really happens and the color change was minimum. So we changed it into about 5/2 bleach/water ratio. Different color and fabric might need different ratio, so don't be afraid to experiment. (;

Next lay out the T-shirt (with nothing around to avoid damage from bleach splatters). Place a plastic bag inside the T-shirt so the bleach doesn't seep through to the back of the garment (optional).
Commentary: We also laid a plastic bag that we had cut out into a bigger spread under our tanks, just to be safe if we do spill some bleach.

Then, start spraying! Start by spraying a little, use your hairdryer to make them dry faster and to see the pattern emerging. This helps you know where to spray next.
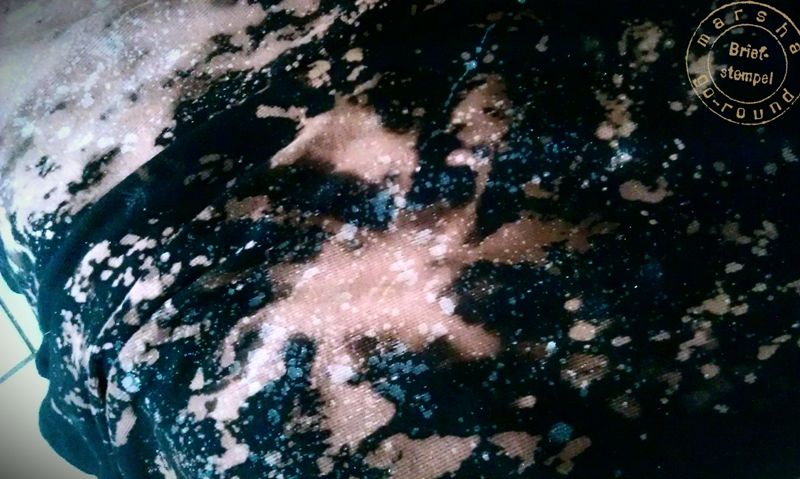
Commentary: By hairdrying them, you'll see what color appears out of the bleaching process like magic! Different color and fabric will have different color change. For instance, dark blue might produce pinkish color change, black to rusty brown (like Amanda's), and dark brown to red (like mine).


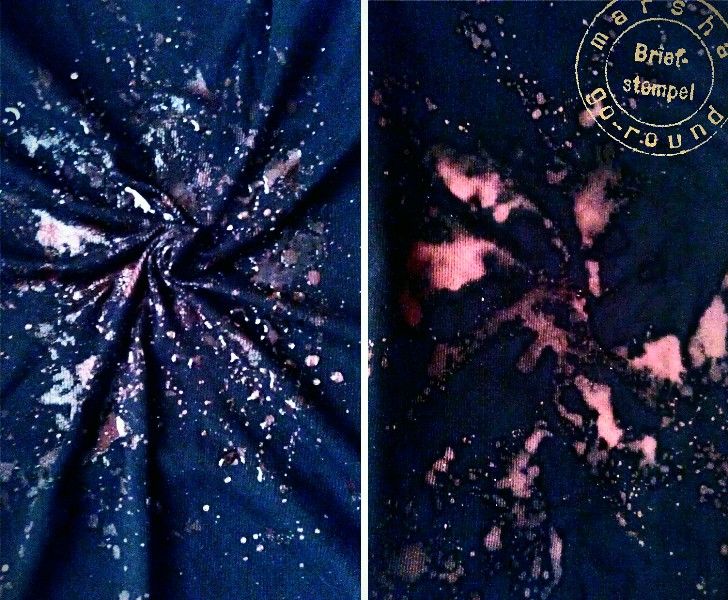
To help create a galaxy effect, twist the fabric in the middle to form a swirl, spray more heavily in the middle to form the center, and use your hairdryer again!
Commentary: In our first process, we found out that our spray bottle didn't really work as expected. Instead of smooth spray, it only produced big blotches. To get around this, I just poured some bleach onto the middle instead of spraying and then used my fingers to help even them out, and Amanda just kept spraying more! (;

Continue spraying until you get the pattern you want, and use your hairdryer again.
When it's dry, rinse the garment with lukewarm water (this step is different from the Wise Rabbit Says) to stop the bleaching process and prevent it to eat holes in your garment! Then let it dry again.


For the final touch, Wise Rabbit Says instructed to 'use the paint brush to slowly drip and stronger bleach solution (1 part water,1 part bleach- you only need a tiny amount for this) to give the effect of individual brighter stars'.
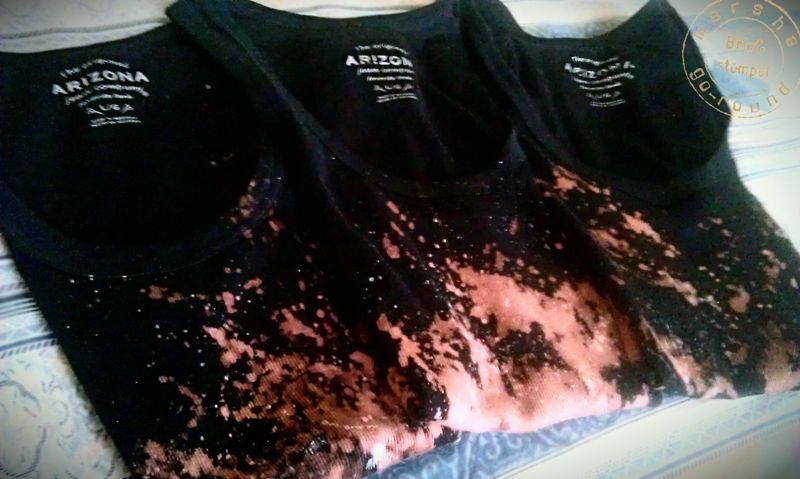
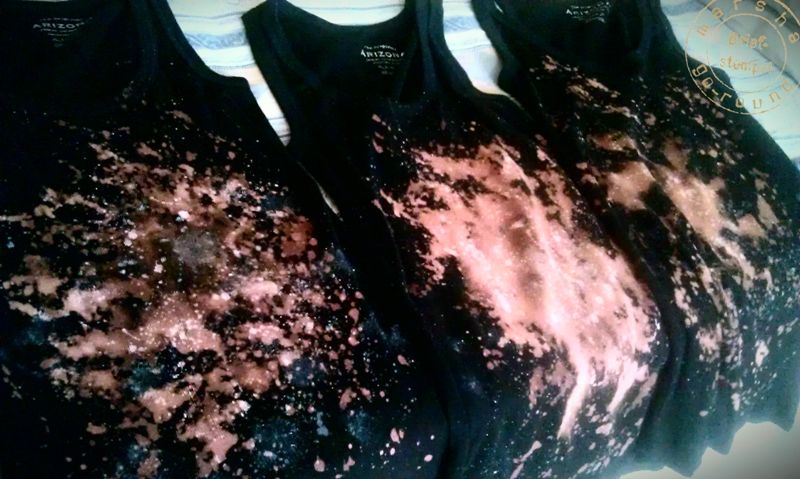
Commentary: Instead of more bleach, we used white acrylic paint and old toothbrush. Amanda and I had different method for our final touch. Amanda grabbed some of the acrylic paint (mixed with a little water) with her old toothbrush and just flicked the toothbrush to create the 'star drops'. On the other hand, I, too, grabbed some of the acrylic paint with my toothbrush and dabbed it onto different spots of the fabric, sometimes slightly brushing it. These two different methods produced different results as seen above! (; So, whichever you prefer!

And, TA-DAA! There you go, a brand new DIY Galaxy Tee / Tank of your own!

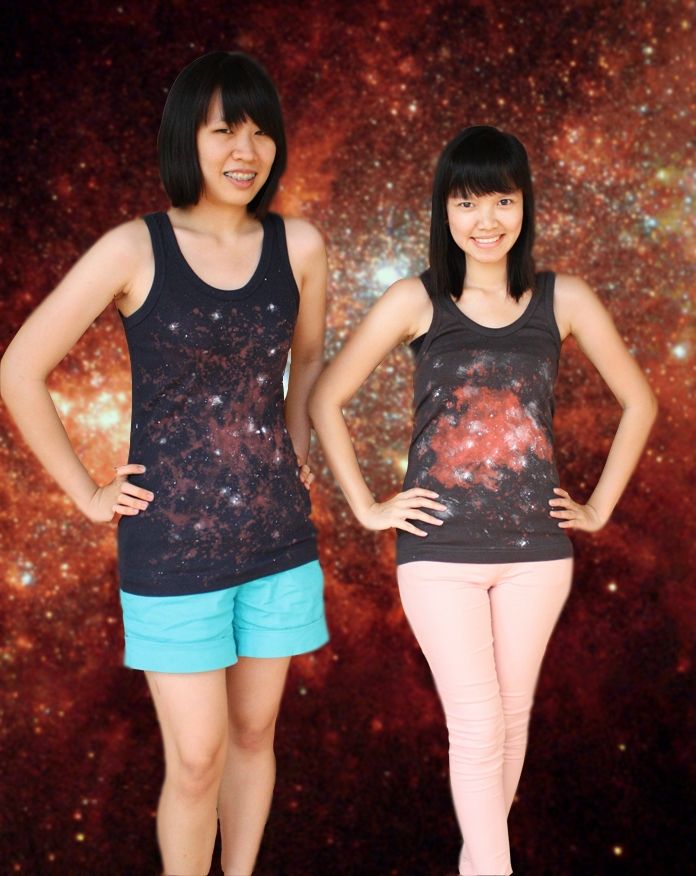
The above picture shows the brown one and bluish black one, instead of the pure black I used along the post. We also wanna thank Wise Rabbit Says big time for the tutorial.
And for you, beautiful readers, hope you enjoy this DIY, cos we certainly did! (; Feel free to experiment with different color and fabric, and share the result or the difficulties you found with us! Hopefully we can help you get around the errors. (; Toodles!


Evaluation?

Monday, August 20, 2012

I'm often asked by my friends and acquaintances, "What makes your relationship last, still strong despite occasional problems?" In my answer, there are several things that I usually will mention. But in this post, I would share one particular thing among others that help me and my boyfriend maintain our relationship.

Yep, it is indeed evaluation!

I find it most useful to help us reflect back to the things we have done, what we love and what we dislike about those, and what can be done to improve them. So, what we normally do in evaluations?

First thing first: Evaluation session does not have to be formal, or clearly declared as "Evaluation Session". It can be carried out during your daily or nightly conversation with your loved one. However, there are a few things that, in my opinion, are needed to make this 'evaluation session' work as planned or as expected.


Number one. Make sure that the situation is right. There is no use in doing evaluation when either party is not into it: sleepy, in a bad mood, distracted... If you push your partner into doing the evaluation without he/she really willing to, well, don't expect too much of the result. The common things you'll find out of that circumstance: he/she won't contribute much in identifying the problem and in the solution seeking, he/she will just say "Mmm? Yes.. No.. Whatever you want, darling." and blardi-blardi-blar. In the end? You will only get pissed at your partner hhas So what can you do? Choose the good timing. If there is no good timing, create one. For example, take your loved one to a tea parlor for a relaxed, and private, tea time.

Number two. Now that you are on the same page to start an evaluation session, that you both understand it is important, you can both prepare yourselves to enter the session. I did a mistake recently. I planned a surprise evaluation session with my boyfriend without proper heads-up. The result? Because he wasn't prepared, he didn't have enough time to remember exactly what we've been through per parts and to prioritize which to bring up. And because of that, I did most of the talking. Yeppp, my bad. :p You see, without meaning to be sexist, I find out that most men don't see the world as women do. Most women take everything personally, tend to overanalyze every detail, etc etc etc. Truth is, men don't! hhas So they need a lil bit of preparation to recall the things needed for an evaluation.


Number three. I will play it simple on this one. Just be honest, say what you feel and what you expect. Sarcasm doesn't really help, although I have to admit sometimes it's tempting to do so especially for us girls (tested and proven from girl talks with girl friends). :p

Number four. Be open-minded, not defensive. This is pretty basic, but pretty hard to put into practice. Hello honey, news flash? This is evaluation anyway! hhas Sure there will be revelations, some might be unexpected, and sure there will be someone getting evaluation. I had an experience on this just before our second anniversary. I had such high anticipation because I was about to reveal what I've been suppressing for God knows how long. Unfortunately, what I thought would be releasing, that I would finally get to express some suppressed fear and that he would understand, didn't turn out as expected. hhas
You see, I don't know if it's just my boyfriend whose neocortex is so dominant, or most men are indeed like him as well, but my boyfriend loves to debate me! hhas And in our most recent evaluation, that made me perceive him as being defensive. He pointed out that it was ridiculous for me to think and to feel that way, because he's done this this this, he felt that that that. But like what I have stated over and over again, I was just expressing what I feel inside! hhas So notes to you, guys: we, girls, often think and feel some bad things, even if we know that's not right. Sometimes we just wanna share those thoughts and feelings with you, what trigger us to think/feel that way, and hope that you will at least understand our sensitivity about that particular issue. It doesn't necessarily mean blaming you guys or anything (or, at least I don't). (;
So to girls: let's maintain our tone, prepare our speech so that we put what we mean right, and never blame.
So to boys: just accept that girls can be irrational, no need to be defensive. Listen first, try to understand.


Number five. Wait until your partner finish speaking. Hold the urge to debate. There is a reason why God gave us two ears and one mouth. (; So I'll repeat, to both parties: Listen first, try to understand.

Number six. And remember, this is an evaluation session, not a trial court. Remember your objective. Your objective is to find what needs to be maintained and what to improve, not to find who's to blame.

These 6 things are amongst many things that I consider pretty important to have in evaluation session. :D Of course, every couple might differ, but isn't it the best part of a relationship: to learn more and more every day about your other half and discover new things about your relationship?

With that said, I wish you and your other half all the very best! (;